

The Vegan Man Cave Smoothie
September 13th, 2012 by NashVeggie No comments »While thumbing through Twitter last week I came across a tweet by a good followee for a smoothie recipe. I’m always looking for smoothie ideas as I usually have one a day. This one stood out with an ingredient I had never considered: Oats. A protein powerhouse in itself it was mixed with some tasty ingredients and began salivating for this smoothie.
1 1/2 frozen banana
1/3 cup oats
1/2 cup chocolate almond milk
1 heaping spoonful of almond butter
Blend in VitaMix for 20 seconds until smooth.
A few days passed and still I had no chance to make this smoothie, one that I knew would be filling and should be an early morning drink. Once I got around to trying it I was blown away. Wow! This things rocks! Very tasty, very filling and full of protein. You’ll definitely need a Vitamix for this smoothie to blend up the oatmeal. I don’t think a standard blender is up to the job.
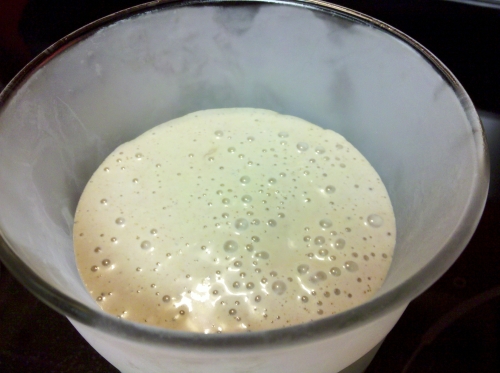
If smoothies are your thing or even if they’re not you need to treat yourself to a Vegan Man Cave Smoothie. The dude is onto something here. I can’t believe he hasn’t patented this yet. I fully expect to see him on a late night infomercial soon touting this smoothie. (Dude, get on this!)
Make Your Own Kombucha
September 11th, 2012 by NashVeggie 1 comment »Kombucha has been the rage for the last couple of years and I never really took much notice. Each time I decided to try a bottle of the fermented tea I recoiled as it was so acidic. I may as well buy a bottle of vinegar to drink. Of course, some people like this and I know it’s an acquired taste so I set out to find a sweeter variety, though, I never found one that I really liked. That’s when I found out I could make it at home and control the flavor. After doing a bit of research I thought easy enough.
The hardest part would be coming across a SCOBY (Symbiotic Colony Of Bacteria and Yeast). If you don’t have a friend who is brewing their own kombucha and can in turn give you a SCOBY then growing your own is the way to go. It will take a bit of time but in the end it will add to the do-it-yourself feel of the project.
Growing Your Own SCOBY
To grow you own SCOBY you’ll need the same equipment to make your own kombucha. This isn’t a big investment and most people have the required items around the house.
1. A gallon glass jar. Do not use plastic as bacteria can take up in the surface and glass is much easier to clean.
2. Teabags. I use black tea. In fact, I used Lipton. You can use just about any teabags you want. This can be the same teabags you will make your end kombucha with later. Don’t use Earl Grey as it contains bergamot oil that will spoil your brew. Also, no herbals. Green or white will work fine, as well.
3. Clean water. This, as you would guess, is the most important step. Do not use chlorinated water straight from the tap. If you must use tap water be certain you filter it with a high quality filter. If at all possible get spring water or go to the store and buy a gallon.
4. One bottle of raw unflavored kombucha. There are many brands to choose from. Just make sure it’s free of fruit or fruit juice.
5. Sugar. I used vegan cane sugar or evaporated cane juice. This is the food that the yeast will feed on. Feed them something good. You could use regular refined white sugar but why would you want to?
6. A paper towel and a rubberband. This will keep the nasty out of your brew. Flies and dust aren’t good for your drink.
Wash the gallon jar very well in very hot soapy water. Sterilization isn’t necessary but you do want to get that jar sparkling clean. Boil 4 cups of water. After the water comes to a boil remove it from the heat and add 5 teabags. I like my tea strong so if you like it a little weaker drop it to 4. Let the tea steep for about 30 minutes and remove the bags. Again, if you want a weaker brew feel free to remove the bags before 30 minutes. Add 1 cup of sugar to the tea and stir to dissolve. Your tea will still be very warm at this point so let it rest for an hour or so until it cools to room temperature. Hot tea will kill your initial yeast and bacteria giving you nothing to grow. After the tea cools pour it into the gallon jar. Fill the jar with the rest of your spring water to about 2/3 the way up. Pour in the bottle of raw kombucha. Cover with the paper towl and secure it over the top with the rubber band.
Put the jar in a place where it can sit undisturbed for about 3 weeks. Depending on the temperature in your home it may take more time it may take less. I’ve been growing this summer and we keep our home at about 76 degrees. In 3 weeks I had a SCOBY ready to go. You may take more time or less. In a week or so you’ll notice a white film on the top of the tea. This is your SCOBY beginning to grow. Keep an eye on it and be sure it’s free of mold. You may notice brown spots but those are normal. Anything hairy or fuzzy is bad. It will go slowly but once it gets about 1/3 to 1/2 inch thick it’s ready. Once you’re at that point you’re ready to brew some kombucha to drink. Remove the SCOBY and set it aside in a large bowl with just enough tea from the jar to cover it. Pour the kombucha out of your jar. You’ll likely not want to drink this as it will be very acidic from the longer brew time. Clean your jar and get ready to brew a batch to drink. Don’t refrigerate your SCOBY. At this point you want to be ready to go with a new batch.
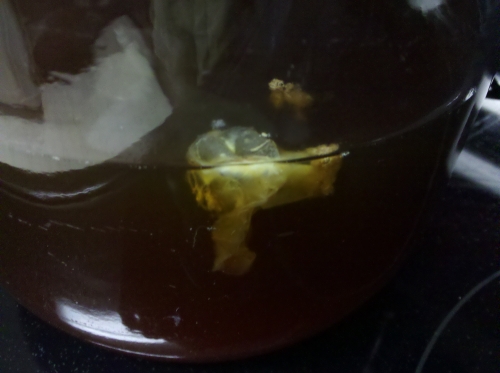
The SCOBY beginning to grow on top of the tea.
Brewing Kombucha
You’ll need the same equipment as above in the growing of a SCOBY except you’ll need a SCOBY and you won’t need an entire bottle of kombucha. The entire process is nearly the same as growing your own SCOBY with a couple minor differences. I’ll list it all for you again:
1. A gallon glass jar. Do not use plastic as bacteria can take up in the surface and glass is much easier to clean.
2. Teabags. I use black tea. In fact, I used Lipton. You can use just about any teabags you want. This can be the same teabags you will make your end kombucha with later. Don’t use Earl Grey as it contains bergamot oil that will spoil your brew. Also, no herbals. Green or white will work fine, as well.
3. Clean water. This, as you would guess, is the most important step. Do not use chlorinated water straight from the tap. If you must use tap water be certain you filter it with a high quality filter. If at all possible get spring water or go to the store and buy a gallon.
4. 1 cup of kombucha. This can be store bought kombucha or kombucha out of your last batch. Don’t use the kombucha from growing your own SCOBY. Chances are it will be very acidic from the time it took to grow the SCOBY. If this is your first batch after growing your own SCOBY use a cup of raw kombucha you purchased at the store. After your first brew, however, you’ll have fresh kombucha to start each batch with.
5. Sugar. I used vegan cane sugar or evaporated cane juice. This is the food that the yeast will feed on. Feed them something good. You could use regular refined white sugar but why would you want to?
6. A paper towel and a rubberband. This will keep the nasty out of your brew. Flies and dust aren’t good for your drink.
7. A SCOBY. This can be one you grew yourself using the instructions above or one you acquired from another kombucha brewer. In the end you’ll have another SCOBY to share or make 2 batches as a new SCOBY grows with each batch you brew. Don’t reuse a SCOBY more than once.
Wash your jar very well in very hot soapy water. As before in the SCOBY growing, sterilization isn’t necessary but get the jar sparkling clean. Boil 4 cups of water. After the water comes to a boil remove it from the heat and add 5 teabags adjusting for stronger or weaker tea. Let the tea steep for about 30 minutes and remove the bags. Again, if you want a weaker brew feel free to remove the bags before 30 minutes. Add 1 cup of sugar to the tea and stir to dissolve. Your tea will still be very warm at this point so let it rest for an hour or so until it cools to room temperature. Hot tea will kill your initial yeast and bacteria giving you nothing to grow. After the tea cools pour it into the gallon jar. Fill the jar with the rest of your spring water to about 2/3 the way up. Pour in the cup of kombucha and place your SCOBY into the jar. The SCOBY may float or it may sink, it doesn’t matter. Cover with the paper towel and secure it over the top with the rubber band.
Place the jar where it can sit undisturbed for about 7 days. After 7 days you will want to taste your kombucha to see if the flavor is at the point you like. You’ll have a SCOBY growing on top of the tea at this point as well as the one you started the brew with. Remove the paper towel and rubberband from the jar. Do not dip a glass or spoon into the brew. The best method for tasting is using a straw remove a small amount to tea from the jar by dipping the straw into the tea and placing you finger over the end of the straw. You’ll want to push the edge of the SCOBY growing on top of the tea just a little to the side to get your straw in. If the SCOBY drops under the tea that’s OK. Release the tea into a glass to taste. DO NOT drink from the straw and put the straw back into your brew. This will introduce all kinds of nasties to the brew and ruin it. You’re growing bacteria in the jar and you want to be certain to not introduce bad bacteria as those will grow just as well. I like my brew with a little bite so I go 10 days on average. The longer you brew the more acidic it will get. Once you get to the flavor desired you’re ready to bottle your brew.

Kombucha in the jar. This was a small batch. A typical brew is about twice this amount.
Bottling Kombucha
If you drink your kombucha straight form the brewing jar you may notice it missing that fizz the store bought kombucha has. To get that fizz you need a secondary fermentation. That’s where bottling comes in. I reused beer bottles and a caped them with a capper. You can also use flip top sealing bottles. I don’t recommend canning jars if you want a good fizz as they won’t seal and aren’t airtight enough in this process.

Bottled kombucha ready for secondary fermentation. The brown bottles have bits of apple and the larger bottle has mango. All of the fruit is freeze dried as I find it flavors much better.
You want to be certain the bottles are as clean as possible. Hot soapy water is the key. Rinse and dry the well and fill each bottle leaving enough room at the top for air to assit in the fermentation. I filled my reused beer bottles about 3 inches from the top. If you want to flavor your brew now is the time to do so. You can use fresh or frozen fruit but I’ve found for the absolute best flavor freeze dried fruit works best. My favorites are apple and mango. Drop just a few small chunks into the bottle before sealing. Also, you can add a teaspoon of sugar to each bottle for a little “food” for fermentation. This is completely optional but you may find you’ll get a better fizz. Seal the bottles and store them undisturbed at room temperature for about 5 days. I know,you want to drink but patience is needed. After 5 days you can put the bottles into the refrigerator to chill and drink when ready.
Burger UP Marathon Burger is Not Vegan
September 8th, 2012 by NashVeggie 5 comments »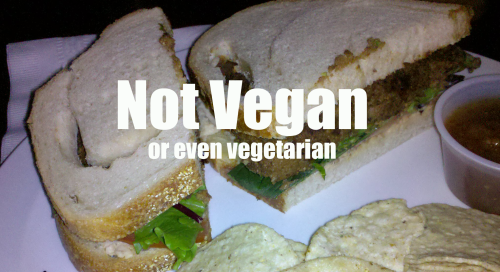
A little disconcerting news to those who are looking for a vegan veggie burger in Nashville, it has been brought to my attention by employees of the restaurant that the black bean and quinoa burger lauded by many at Burger UP, otherwise known as the Marathon Burger is NOT vegan or vegetarian. One of the ingredients used is their made-in-house ketchup which contains standard Worcestershire sauce that has anchovies. This Worcestershire sauce is also used in the ketchup they serve to dip those fries in it as well. The ketchup isn’t just served on top of the Marathon Burger, it is IN the burger so asking to leave it off it isn’t so simple. Though the Marathon Burger is not listed as vegan or vegetarian on their menu many have inquired about it and told it is while it has garnered many reviews in local publications as suitable for vegans and vegetarians without any correction. Adding egg is a common move by restaurants when making veggie burgers and vegans know to ask about that in advance but adding a non-vegetarian ingredient such as standard Worcestershire just makes no sense whatsoever as you’ve just relegated the burger to the same as your animal meat sandwiches without so much as a mention to this on the menu. Listing those ingredients on the menu would go a long way.
Hopefully, we can urge Burger Up to make a change.
UPDATE: I’ve been told that the Marathon Burger also has panko bread crumbs which, in this case, contain egg. While those would be vegetarian they are of course not vegan.
UPDATE: Speaking with the owner lends the news that Burger Up is working to revise their Marathon Burger recipe with a vegetarian Worcestershire sauce. This is great news.
New York City – The Cinnamon Snail Vegan Lunch Truck
July 24th, 2012 by NashVeggie 3 comments »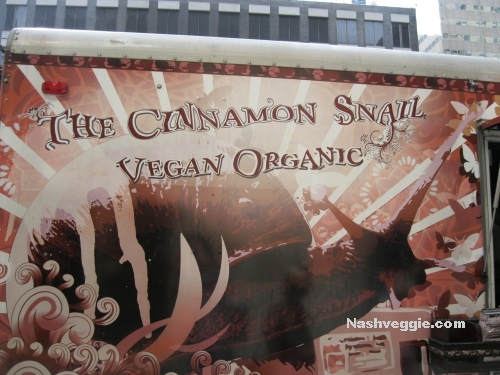
People look at me odd when I tell them we vacation for food. It’s true. We always pick a destination based on availability of vegan eats. This is why Denver, Portland and New York City are regularly at the top of our vacation list. Most people head to the beach but I’ll head to the vegan barbecue.
This is not a Nashville post. You can think of it as a wishful thinking Nashville post. Nashville doesn’t have a vegan food truck. In fact, a discussion I had once with a very popular Nashville food truck over adding a single vegan item to their menu was met with a “Why would anyone want to eat that?” Unfortunately, that pretty much sums up the mentality over vegan food when you mention it to most restauranteurs in this area. I wonder, why would anyone want to eat decaying animal flesh or pus-filled, molded cow secretions? But I digress. Suffice it to say that food truck will get no attention from me.
On we go to the big city. The land of towering buildings. The streets filled with food and many of them vegan choices!
When I discovered New York City was home to a vegan food truck I was honestly excited. The thrill of the hunt! Would we be in the same area on as The Cinnamon Snail on a given day or would we be hitting the train to search out this animal-free street runner? It didn’t take long to discover via The Cinnamon Snail’s Twitter feed that they would park just 2 blocks from our hotel every Tuesday. Perfect for a quick breakfast bite before hitting the city.
Just around the corner and the kid spotted the graphics-clad truck sitting street side. Now, she’s all about doughnuts. She had that doughnut planned form the time she discovered The Cinnamon Snail served them up in mobile fashion. It didn’t take her long to pick her flavor, raspberry glazed. The doughnuts are not on the small side and definitely not small on flavor. These are not cake doughnuts, they’re the fried type. My favorite, and honestly, the only way to make a doughnut. That doughnut didn’t last long and she was looking for her next morsel form the menu. Mrs. Nashveggie went for a cinnamon roll. of course, she makes her own cinnamon rolls. Her cinnamon rolls are perfect. They have just the right amount of cinnamon sugar stickiness rolled into a soft, yet lightly chewy, dough that comes out of the oven ready to melt in your mouth. I think she picks cinnamon rolls when she finds them just to compare. We shared the roll and it was very tasty. Not a fluffy dough. This cinnamon roll is denser but still very flavorful. They’re filling and a perfect side to a cup of coffee (which you can also get from The Cinnamon Snail with soy creamer if desired!)
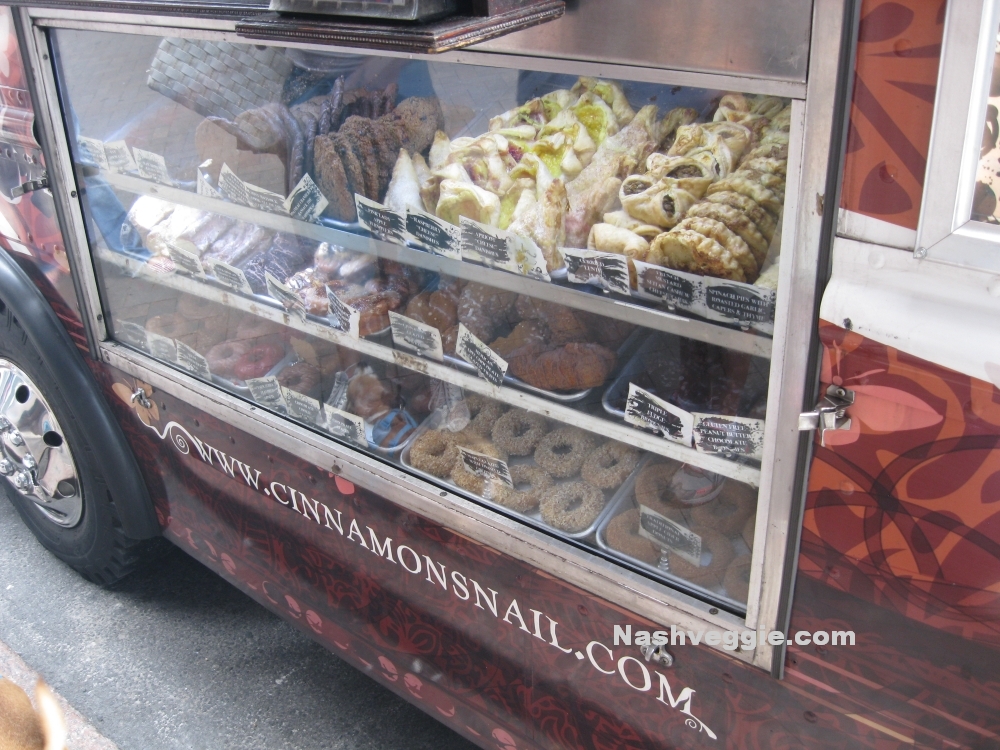
The window prominently placed in the front of The Cinnamon Snail displaying the delicious vegan sweets.
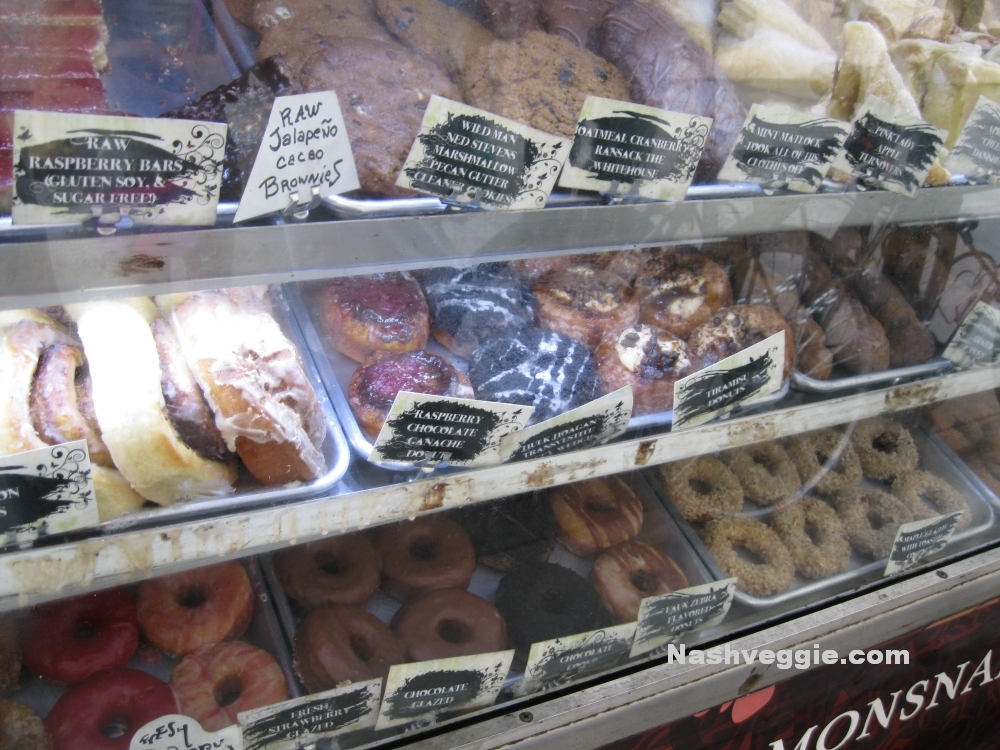
The sweets window - If raw is your thing, you have choices on the top shelf.
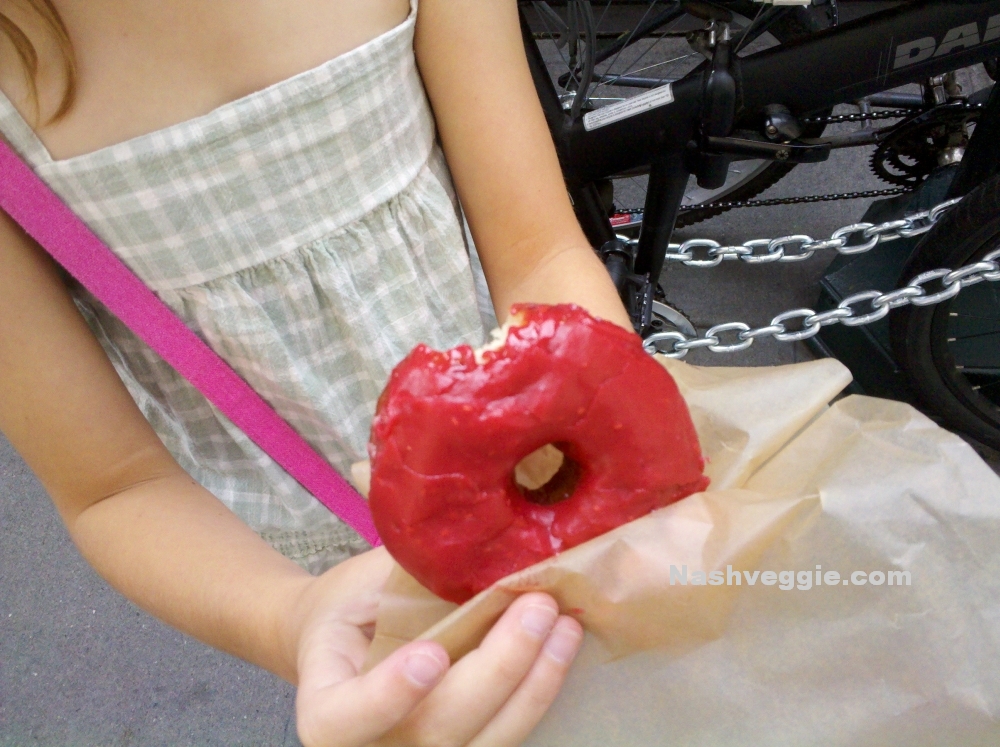
The Kid's Raspberry Glazed Doughnut

The Cinnamon Snail cinnamon roll
The kid, still wanting more, decided to try an apple turnover. Very flaky crust and plenty of filling. Unfortunately, I didn’t get to try it so I can only tell you it was good based on how long it lasted. Under 30 seconds and she’s looking for more. That’s a good gauge of great vegan food when it comes to the kid. Her reward for being such a fan of those sweets: A Cinnamon Snail t-shirt from the fine crew of the The Cinnamon Snail. (Thank you guys! That’s was great!)

Pink Lady Apple Turnover

Owner/Chef Adam Sobel (Right) and crew. Don't let them freak you out. Always a smile and these guys can whip out some mean vegan vittles!
Based on our first visit to The Cinnamon Snail we deemed it necessary to visit again. Not many places will get a second visit from us on vacation but The Cinnamon Snail proved well on our first encounter and sounded good a few days later. This time we found them to be on Wall Street for the day so we hopped the train for a trip to the Financial District. We walked a few blocks down Wall Street passing other food trucks setup in hopes of grabbing the monetary swingers on their lunch breaks. A person waiting at one, another waiting for customers and most just waiting with no one ordering yet. It wasn’t hard to find The Cinnamon Snail. There was already a good line formed for the vegan eats. In fact, they had the only line out of the other trucks we passed on the way.
This time it was lunch. We needed street-walking sustenance. Looking at the menu we chose what sounded to be delicious, I the Korean BBQ Seitan and Mrs. Nashveggie the Maple Mustard Tempeh Sandwich. The kid wanted another doughnut which was fine knowing she could share some of our non-sweet vittles.
We found a public area at nearby Deutsche Bank and broke into our boxes. At first sight I was wishing I had went with Mrs. Nashveggie’s choice as my BBQ looked on the small side. I was wrong. Once I took a bite I realized the tortilla was stuffed full and also full of flavor. This thing was delicious. I also tried the Maple Mustard Tempeh and I can understand why it is one of their most popular menu items. Delicious! The Korean BBQ Seitan was full of seitan chunks. They’re unseasoned when prepared it seems but made so they can take on the flavor of the item the make with them. There was lightly steamed kale in there with a very spicy sauce that didn’t overpower the sandwich. A great lunch for the three of us and just under $20 including the doughnuts the kid wanted. This is a deal in Manhattan.

The line at The Cinnamon Snail on Wall Street. This is a typical line for The Cinnamon Snail. Vegan eats are popular! (I'm talking to you Nashville Food Truck guy.)
After devouring our lunch we thought about a doughnut to-go. To-go being an odd term to use when grabbing one from a food truck. Back to the truck I went and discovered the line was 24 people deep and a bit slow moving. I waited in line for a few minutes. While waiting a few people passed The Cinnamon Snail, took a look in the direction and said “Oh, that’s just sweets.” or “They only have pastries.” This is probably because of the 1. The name. 2. The window beneath the ordering area that displays all of their pastries and doughnuts, the only food display window. 3. The absence of anything announcing anything not sweet anywhere on the truck that would be visible to distant passers-by and “Cinnamon” emblazoned in huge letters, a word most people relate to sweets. Granted, they had a long line so most people are aware they serve savory goods but it seems they could get more with adding perhaps an image of a sandwich somewhere or even a specials board in plain sight on the side of the truck stating something like “TODAY’S VEGAN HOTNESS: MAPLE MUSTARD TEMPEH SANDWICH! SAVORY GOODNESS!” Since the line was very slow to move I decided a doughnut was not going to be had as we had many things on tap for the day and we had to get to the next stop.
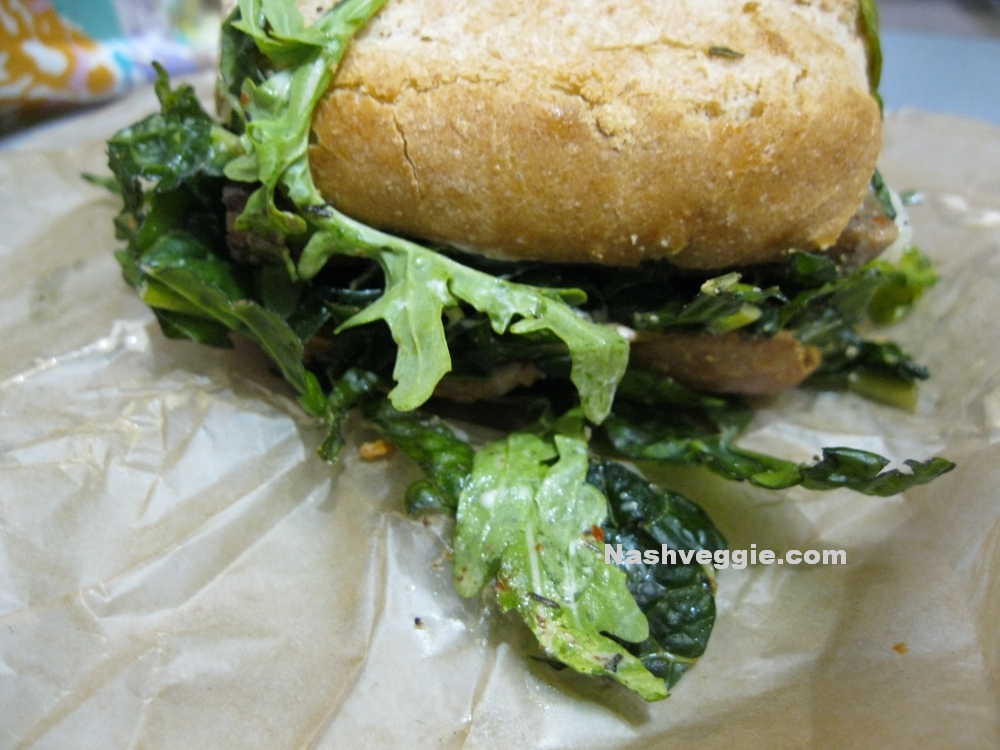
Maple Mustard Tempeh Sandwich - There's plenty of delicious tempeh under that.
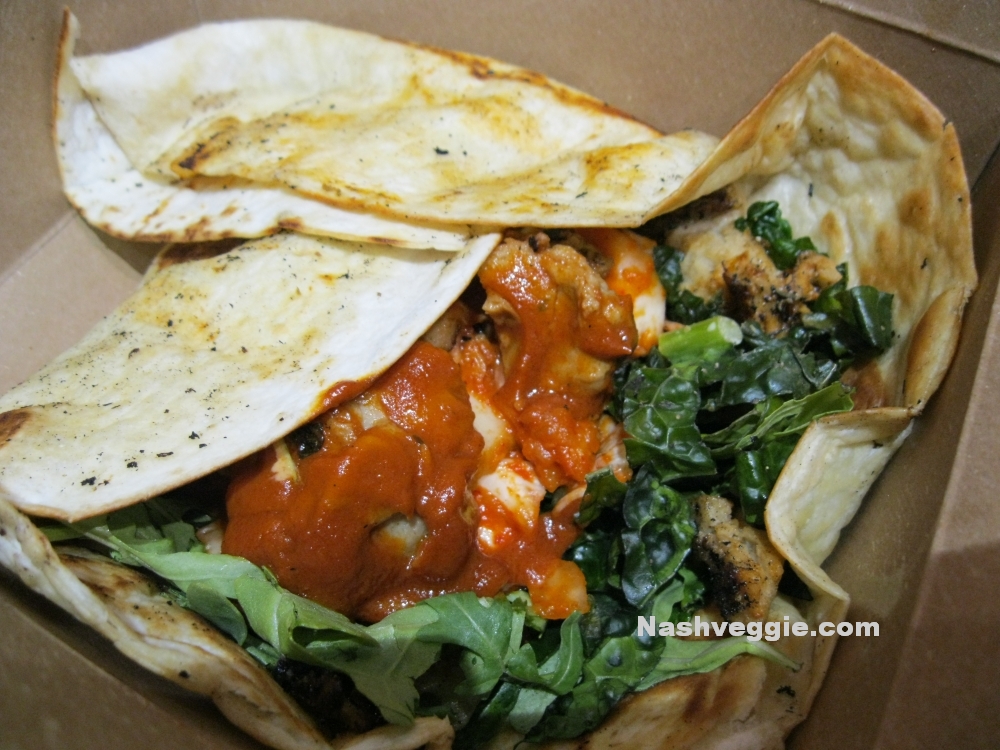
Korean Barbeque Seitan - A grilled tortilla stuffed with seitan, greens, kimchi and spicy vegan butter.
If you find yourself in New York City and decide to search them out be sure to check their Twitter as they may not be in the same locations we found them. They’ve had some issues with the NYPD and parking lately that appears to be attributed to other trucks trying to tie up the limited space they find. Overcrowding seems to be an issue.
Unfortunately, this would be our last visit to The Cinnamon Snail as New York City boasts many fine vegan food joints and we must get our eats on in variable fashion. However, when we return to New York City, and we will return soon, I’ll be hitting the streets on the hunt for The Cinnamon Snail. I suggest you do the same.
